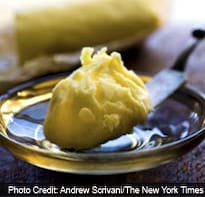
Cultured butter: Fatter, Nuttier, tangier

Advertisement
Cultured butter: Fatter, Nuttier, tangier
Diane St. Clair started making her extraordinary butter - the butter that Thomas Keller serves at Per Se and the French Laundry - after breaking her leg in an accident with a team of draft horses on her farm in Vermont.
That's when she determined that cows were safer. "They'll kick you at first," she said, "but they'll eventually stop."This was in 1999, when only a few committed people (and no one whom St. Clair knew) made small-batch artisanal butter in the United States. Back then, the best butter was imported from Europe.It was the very beginning of the European butter trend. Americans were just discovering that this butter was higher in fat than our typical butter (82 to 86 percent versus 80 percent), which made it far better for baking and more pliant for spreading.But there was something else about European butter. It was richer in flavor, with notes of hazelnuts and a pronounced and often complex tang.
Advertisement
After researching traditional dairy techniques in a handful of out-of-print books, St. Clair realized that what made high-end European butter taste so much better than "the bland sticks of fat in the supermarket," she said, was that the European cream was cultured, or fermented, before it was churned.Here's a little bit of history: Before the widespread industrialization of the dairy industry, most butter in the U.S. was made with cultured (also called clabbered) cream. Fresh cream from the evening milking would be allowed to sit out overnight so that the milk could settle and the cream could rise to the top.During those unrefrigerated hours, the microorganisms in the milk caused it to sour ever so slightly, taking on a nutty tanginess. This cream was then churned into butter, which retained those delightful flavors.Once all dairy was routinely pasteurized the active cultures were killed, and therefore the milk could no longer sour on its own. Thus it became easier for farmers to make butter out of sweet cream, because creating cultured cream added another step (live cultures would have to be added back into the pasteurized milk, which is now standard practice in Europe).
Advertisement
This country grew used to the milder taste of sweet cream butter. That is, until it rediscovered cultured butter via the imported European stuff back in the 1990s. Because of its growing popularity, a handful of U.S. dairy farmers started producing European-style high-fat cultured butter.Allison Hooper, the founder of Vermont Creamery, was one of them. Haunted by the flavor of the creamy, dense, bright yellow butter she could not get enough of during her college junior year abroad in Brittany, France, she decided to make it herself."It was to die for, and no one was making it here," she said.In 1993 she began a very small production run at her farm in Vermont. Her plan was to sell to French chefs yearning for the butter of their home country. But she also found an audience of passionate home cooks who were buying European butter.
Advertisement
"We have the added benefit of being produced locally," she said.Of course, even more local would be to make cultured butter in your own kitchen. And very recently, a small but growing number of home cooks and chefs, including David Kinch of Manresa in California and Carlo Mirarchi of Roberta's in New York City, have been doing just that, possibly inspired by the same do-it-yourself urge that's given rise to homemade kimchee, kombucha and sauerkraut.Andrew Tarlow, who owns several New York restaurants, including Marlow & Sons, has been playing with homemade butter for the last three years, using both cultured cream and sweet cream."We had an aha moment when we realized how easy it was," he said, "and I think our butter is better than anything I can buy."
Advertisement
He serves the butter at his restaurants and sells it at his butcher shop, Marlow & Daughters. (The sweet cream butter is $12 a pound and the cultured butter, $13.)The key to his butter, he said, is using really good, fresh cream from pastured cows, preferably of a breed known for producing cream-rich milk.St. Clair has 10 Jersey cows that produce particularly high-fat milk. And because she lets them graze in summer and feeds them high-quality hay in winter, their milk, and her butter, changes with the seasons.Although most of her butter goes directly to a couple of chefs (Thomas Keller and Barbara Lynch at No. 9 Park in Boston), she sells some of it through Saxelby Cheese in early January, when Per Se and the French Laundry are closed. (Orders can be placed in late December at saxelbycheese.com.)Since I have access to excellent farmers' market cream and a growing DIY spirit, I decided to try making cultured butter at home. I had made sweet cream butter many times, a task often begun by accident when I overbeat whipped cream. I was always disappointed with the results, which I found to be on the bland side.Culturing the cream hugely improved my homespun results. And making cultured butter wasn't hard, either. I started with crème fraîche, made by adding a little yogurt to cream and letting it sit out and develop its flavor overnight. The next day, I churned it in the food processor in under five minutes. The hardest part was the last step of kneading and washing the butter curds to remove the moisture. But once I eased myself into it, I found myself enjoying the hypnotic slap-slap rhythm of the butter hitting the bowl.In the end, not only did I get a mound of ultracreamy, nutty-flavored yellow butter, I also got its byproduct: a jar of thick, homemade buttermilk. This was completely different from the supermarket kind, which is made from skim milk with added cultures. It was worth the work of butter-making all by itself.I was tempted to drink all the buttermilk, but forced myself to save some for baking. Then, to see how cultured butter and homemade buttermilk performed in baking, I made biscuits. I baked two batches of the same recipe with one major change. I used sweet cream butter and commercial buttermilk in one batch, and cultured butter and my homemade buttermilk in the other. (To make sure the fat content was the same in both batches, I used a high-fat sweet cream butter for these baking experiments).The difference was striking. The cultured-butter biscuits were softer and more tender because of the acidity of the butter, which helps tenderize baked goods.I also made butter cookies with high-fat sweet cream butter and cultured butter, and the difference was glaring there, too. The cultured-butter cookies were crumblier, crisper and more buttery in flavor (which is exactly what you want in a butter cookie, or in any dish that has butter as a main ingredient).Luckily, cultured butter is becoming easier to find in supermarkets. It's worth seeking out. Or you could always make your own, and I think any true butter fanatic should try it at least once.Aaron Foster, the grocery buyer at the Brooklyn Kitchen in New York, said people have known about high-fat European butters for a while, but they are only beginning to understand its cultured aspect."Once they taste it," he said, "it all clicks."HOMEMADE CULTURED BUTTERTime: 40 minutes, plus 18 to 36 hours' fermenting4 cups good quality heavy cream1/2 cup plain whole milk yogurt1/4 teaspoon fine sea salt, or to taste1. Combine cream and yogurt in a large jar or bowl. Seal jar well and shake aggressively until combined, or whisk well if using a bowl. Cover jar or bowl with a clean kitchen towel and let mixture sit in a warm area of your kitchen for 18 to 36 hours; it should thicken and taste rich and tangy.2. Seal the jar or cover bowl tightly with plastic wrap and refrigerate until it reaches 60 degrees, 1 to 2 hours. If you refrigerate it longer, allow mixture to warm slightly at room temperature before proceeding.3. Line a fine-mesh sieve with a double layer of cheesecloth and place it over a large bowl. Make sure there is plenty of extra overhang of cheesecloth.4. In the bowl of a food processor, add the thickened butter mixture and process on high until the yellow curds begin to separate from the buttermilk, 2 to 3 minutes. It will have the appearance of liquidy cottage cheese.5. Slowly pour the buttermilk through the mesh sieve and then dump the butter curds in. Let sit for 1 to 2 minutes, allowing buttermilk to drip through. Gather the ends of the cheesecloth up and around the butter, pushing the curds down and into a ball. Twist the cheesecloth and squeeze the ball to extract as much buttermilk as possible. You will be left with a butterball.6. Pour the buttermilk into a separate container and reserve for another use. Place the butterball in the empty bowl. Be sure to squeeze out all excess butter from the cheesecloth. Pour 1/3 cup of ice water over the butter and, using a spatula, "wash" the butter, folding it over itself and pressing down to extract the extra buttermilk. Drain off the milky liquid and discard it; repeat this process until the liquid is clear, 4 to 6 times. The butter will start to harden; at that point your hands may work better than the spatula.7. Place the butter on a clean kitchen towel and pat lightly to remove excess moisture. Knead a few times with your hands and pat dry again; this will help extend its storage life. Sprinkle the finished butter with salt and knead a few more times to combine.8. Lay out a sheet of parchment paper, or two if you would like to divide the batch in half, and place the butter on the paper. Form the butter into a log and then roll it up in the paper and twist the ends to seal. Make sure the log has a uniform thickness throughout. Refrigerate until ready to use. The butter will last about a month in the refrigerator.Yield: About 3/4 poundCULTURED BUTTER COOKIESTime: 50 minutes, plus at least one hour's chilling250 grams all-purpose flour (2 cups)3 grams baking powder (1/2 teaspoon)1/4 teaspoon fine sea salt2 sticks salted, cultured butter, at room temperature (1 cup)130 grams granulated sugar (2/3 cup)1 large egg yolk55 grams Demerara sugar, for rolling (1/4 cup)1. In a large bowl, sift together flour, baking powder and salt.2. In an electric mixer fitted with the paddle attachment, beat together butter and granulated sugar until lightened in color and fluffy; beat in egg yolk until combined. With mixer running on low, add flour mixture until incorporated.3. Divide dough into two balls. On a clean surface, roll each ball into a 1 1/2-inch log. Sprinkle the Demerara sugar over a sheet of parchment. Roll each log in the sugar until the outside of the dough is thoroughly covered. Cover logs tightly with plastic wrap and refrigerate at least 1 hour, or overnight.4. When you are ready to bake the cookies, heat oven to 325 degrees. Line 2 baking sheets with parchment. Use large, sharp knife to cut each log into 1/4-inch-thick rounds. Place cookies 1 inch apart on prepared baking sheets. Bake until cookie edges and bottoms are dark golden brown, about 18 minutes. Cool 5 minutes on baking sheets, then transfer to a wire rack to cool completely. Store in a tightly covered container at room temperature.
Note: Measurements for dry ingredients are given by weight for greater accuracy. The equivalent measurements by volume are approximate.Yield: 5 dozen small cookiesBUTTERMILK BISCUITSTime: 30 minutes335 grams all-purpose flour (2 2/3 cups)75 grams cake flour (3/4 cup)10 grams baking soda (2 teaspoons)4 grams baking powder (1 teaspoon)6 grams fine sea salt (2 teaspoons)15 grams granulated sugar (1 1/2 tablespoons)2 sticks salted, cultured butter, chilled and cubed (1 cup)1 1/2 cups buttermilk, chilled1 large egg1 tablespoon milk
1. Heat oven to 425 degrees. Line a baking sheet with parchment paper.2. In a large bowl, whisk together flours, baking powder, baking soda, salt and sugar.3. Using a pastry cutter or fork, quickly cut butter into flour mixture until it forms pea-size crumbs and is uniformly mixed. (For flaky biscuits, you want the butter to remain cold.) Make a well in center of mixture and pour in buttermilk. Stir together until it just forms a moist, slightly tacky dough.4. Turn dough out onto a lightly floured surface. Knead 2 or 3 times, then pat out into a 3/4-inch-thick round. Using a 2-inch round cutter, cut the biscuits. Do not twist the cutter; doing so prevents proper rising. To prevent sticking, dip the cutter lightly in flour between biscuits. Also, do not reroll scraps, but pat them together and cut into rounds. Transfer biscuits to baking sheet.5. Whisk egg and milk together with a fork. Generously brush egg wash on top of each biscuit. Bake until brown, 15 minutes. Serve hot.Note: Measurements for dry ingredients are given by weight for greater accuracy. The equivalent measurements by volume are approximate.
Yield: 12 to 15 biscuits© 2013 New York Times News Service


For the latest food news, health tips and recipes, like us on Facebook or follow us on Twitter and YouTube.
Advertisement