When your stores are overflowing with fruit and veg and you’re out of meal ideas, it’s time to start making your own chutney – it’s a cinch to make and lasts for ages in the fridge
We don’t normally think of spring as a time for making chutney. Autumn is – for obvious reasons – the preserving season, when forward-thinking householders dry, smoke and pickle the harvest glut, building up stores to see them through the lean winter months.
March is traditionally known as the “hungry gap” – the period when families had to eke out the last remains of their winter stores while waiting to harvest the first vegetables of the spring.
Not being a medieval smallholder, however, I sometimes find myself out of sync with seasonal traditions. Right now, for example, there’s a glut going on at our house. Every day I open the fridge I am confronted by great muddy heaps of winter veg – carrots, parsnips, and celeriac left over from the weekly veg box.
I’ve been doing my best to get through the root vegetables – roasting them, boiling them in vinegar and butter, mashing them, pureeing them with nutmeg and cream, cooking the celeriac under olive oil to confit it. I even bought a spiraliser to make root veg twirls (quite fun, and a good way to get children excited about parsnips). But I was starting to lose heart until my collaborator on this column, Jane Baxter, suggested that I make some chutney, but with winter veg. Hang the seasons! A man’s got to pickle when a man’s got to pickle.
The great thing about chutney is that once you have made a particular one once or twice, there is endless potential for experimentation. You can use almost any fruit or vegetable, and different combinations of spices. There are just a few rules of thumb to bear in mind before you get going:
• The ratio of fruit/vegetables to vinegar and sugar will vary depending on the sweetness and acidity of the fruit and vegetables. If you use sweet vegetables, such as carrots, or fruit, such as dates, you will need less sugar. Likewise, if you are using acidic tomatoes (probably not at this time of year) you can hold back on the vinegar. As a rule of thumb start with a ratio of 3kg vegetables to 1 litre vinegar and 500g sugar, then adjust for taste.
• Don’t shred your fruit and veg too fine, as you’ll end up with spicy puree; but don’t be too slapdash with your chopping either. Just think about the annoyance of having half an onion falling out of your cheese and pickle sandwich. Daintily chopped vegetables can transform a good chutney into a brilliant one.
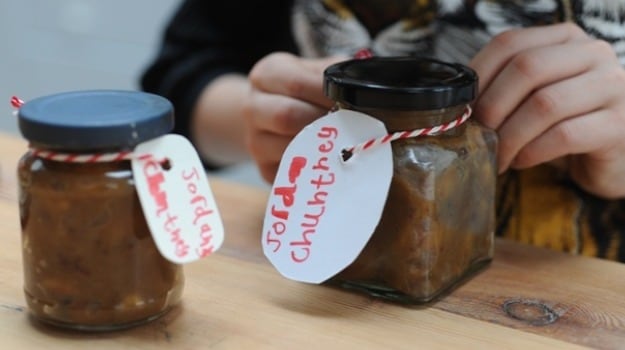
• Chutneys get better when left for a few weeks. They mature. So try not to eat them all at once.
• Be aware that it’s often cheaper to buy jars with food in them (such as cheap jam) than empty jam or chutney jars. Become a jar hoarder.
If you catch the chutney-making bug, it is worth buying a big, preserving (maslin) pan. It gives an even heat for those long simmers, and feels very Mrs Beeton.
Jane’s parsnip, banana and date chutney
Before you start your chutney, have your jars clean and ready to sterilise halfway through the cooking.
Preparation time: 20 minutes
Cooking time: 1 hour 10 minutes
Makes 1.25kg
500g parsnips
750g ripe bananas, peeled and sliced
100g dates, stoned
1 onion, finely chopped
1 apple, peeled and finely chopped
300ml cider vinegar
250g soft brown sugar
1 tbsp curry powder
1 tbsp black mustard seeds
A pinch of cayenne
1 tsp salt
1 Wash the parsnips and put in a pan in which they will all fit tightly. Cover with water. Bring to the boil, then simmer for about 15 minutes or until they are tender. Allow to cool, then peel and chop them into small pieces (about 5-10mm cubes).
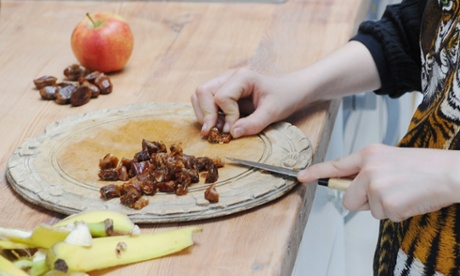
2 Put the chopped parsnips in a large pan with the sliced bananas. Finely chop the dates, the onion and the apple. Add to the pan along with the rest of the ingredients.
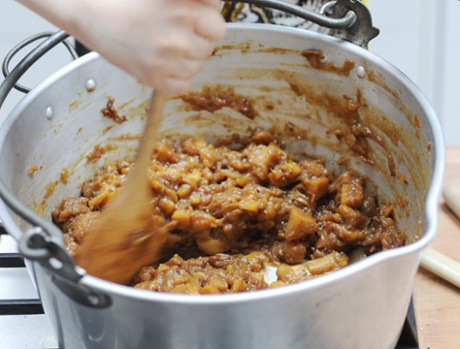
3 Put the pan over a medium heat and stir all the ingredients well to combine. When the mixture starts to bubble, cover and simmer it over a low heat for about 10 minutes. Meanwhile, preheat your oven to 110C/225F/gas mark ¼.
4 Uncover the pan and cook on a medium heat for about 20 minutes, stirring occasionally with a wooden spoon to make sure it doesn’t stick or catch on the bottom of the pan.
5 Put the clean, washed and dried jam jars into the oven for 20 minutes with the lids off to sterilise them. Turn off the oven, leaving the jars inside.
6 Cook your chutney for another 20 minutes while the jars are in the oven. Take the chutney from the heat and remove the jars from the oven. Fill with the warm chutney, pressing down well. Half screw on the lids until the jars are cool: then it is OK to tighten.
Recipe by Jane Baxter. Henry Dimbleby is co-founder of the natural fast-food restaurant chain Leon (@henry_leon). Get your kids cooking at cook5.co.uk
Chutneys get better when left for a few weeks. Photograph: Jill Mead for the Guardian


