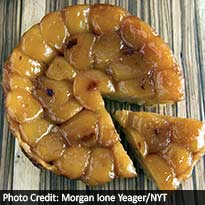
Apple pie is not easy. I have executed lovely crusts folded around inedible sour fillings, perfect fruit sandwiched between a pale bottom crust and a burned lattice top, and most other permutations of pie fail. At the risk of seeming unpatriotic, I would even say that a good pie is not the single best thing you can make with fall's most plentiful and alluring fruit.That title goes to tarte Tatin, a gloriously simple but often misunderstood French confection of apples, caramel and crust. When done right, which is not nearly as hard as its hallowed tradition might suggest, it lets the apples shine in a way that pie never can, with their lovely taste, shape and texture preserved by heat and sugar.Tarte Tatin is not simply French for "apple tart." Tarte aux pommes is French for apple tart, the kind you see on dessert carts all over France: pale wedges of apple, neatly arranged over pastry cream, applesauce or the dreaded frangipane, locked into a perfectly fluted tart shell. This is a prim and often bland dessert that does little for the apples; they may as well be parsnip slices or sashimi-grade tuna. Tarte Tatin also is not tarte fine aux pommes, a sleek dessert in the same family: very thin apple slices fanned out on puff pastry, then blasted in a hot oven into a kind of luxurious apple pizza.
Tarte Tatin is a very particular, even odd, kind of French tart. It was possibly invented, but certainly popularized, around the turn of the 20th century at the Hotel Tatin in the Sologne region of the Loire Valley. (An improbably detailed website, Friends of the Tarte Tatin, tartetatin.org, provides much more background.)It is cooked fruit-side-down on the stovetop, then baked with the crust on top. Either puff pastry or a very buttery pie dough can be used, a looseness that is very un-French. It has big pieces of fruit and a bumpy bite; it needs the edge of burned sugar and the fudgy taste of excess butter. It is messy and chunky, bittersweet and juicy. In short - and this is a compliment - it is as American as any canonical French dessert could possibly be. If you've flopped at making tarte Tatin at home, you may be holding on to certain traumatic memories. Mine include tarts swamped by the juices that seem to ooze nonstop from the apples; failed flips, when the pastry fell obligingly to the serving dish but the apples remained welded to the pan; and apples that went beyond caramelized and into the bitter realm of scorched.To exorcise these demons, I consulted Ron Paprocki, the pastry chef at Gotham Bar and Grill, whose tarte Tatin - although it is served only during apple season, and never listed on the menu - has a cult following. Instead of slices, he serves a whole round, fat tart as dessert for two (though it can easily serve four).Paprocki's method is simple and sensible, and it works: Dry out the apples before the tart is made. He peels and quarters his apples - firm heirloom breeds like Braeburns or Cripps Pinks, though Honeycrisps and Granny Smiths will do - two days in advance, refrigerating them in uncovered tubs with a fan running to encourage evaporation.I got excellent results by just leaving them in bowls in my refrigerator, lightly covered with paper towels. The outer layer dries out and turns a bit leathery, which seems to help the apples hold their shape in the pan. The pieces will brown unappetizingly, but who cares? Later, they will brown appetizingly when you make the tart.In the event that the apples are awash in liquid during the stovetop stage, tilt the pan and spoon it out a few tablespoons at a time, until the liquid is just high enough to soak the rim of the pastry. Don't get overzealous and pour it all out; the sweet juice and natural pectin from the apples help form the shiny glaze that makes tarte Tatin look so appealing.If you have never even tried making tarte Tatin, it may be because of a common phobia: fear of caramel. What with staring constantly into the pan, washing down the sides (why?) and worrying about crystallization and color, home cooks often avoid recipes that begin with this tricky step. One of the many virtues of this recipe is that the caramel simply happens. First, the bottom of the pan is coated with a thick layer of butter and sugar."The butter is a kind of buffer coat," Paprocki said. "It protects the sugar from scorching."
The apple pieces are arranged like flower petals in this sturdy, sugary base, which helps keep them standing upright. Then they are snugged together under a blanket of (store-bought) puff pastry, and the heat of the stovetop begins the cooking process. The apples become caramelized - simmered in toasted sugar, melted butter and their own juices - but without any tending or testing by the cook. The sugar mixture will continue to brown while the tart is in the oven, so in the first step the color should be only a warm golden brown."You don't want French black," he said, sounding like a jaded fashion critic, but in reference to the dark, almost-but-not-quite-burned sugar solution required for desserts like crème caramel.
Avoid failed flips by using a heavyweight nonstick pan or a very well-seasoned cast-iron skillet. Don't wait more than five minutes to turn the tart out. The longer it cools in the pan, the more likely it is to stick.And if the worst happens midflip, the tart will be delicious anyway; gently scrape the apples out of the pan and reassemble them on the pastry. The result will not win any prizes for food styling, but the taste will be the same.Recipe: Foolproof Tarte Tatin
Adapted from Ron Paprocki, Gotham Bar & Grill
Time: 1 1/2 hours, plus 1 to 2 days' aging time for apples
Yield: 8 servings
6 to 8 large, firm-fleshed apples, preferably Braeburn, or use a mix of Honeycrisp and Granny Smith
6 tablespoons/80 grams salted butter, very soft
2/3 cup/135 grams granulated or light brown sugar
1 sheet all-butter puff pastry, about 8 ounces (store-bought is fine)1. At least one day before you plan to cook the tart, prepare the apples: Slice off the bottom of each apple so it has a flat base. Peel and quarter the apples. Use a small sharp knife to trim the hard cores and seeds from the center of each quarter; don't worry about being too neat. Transfer to a bowl and refrigerate, lightly covered, for at least one day or up to three days. (This key step reduces the liquid in the tart. Don't worry if the apples turn brown; they will be browned during the cooking anyway.)2. When ready to cook, heat oven to 375 degrees (or 350 if using convection). Thickly coat the bottom of a 10-inch heavy ovenproof skillet, preferably nonstick metal, with butter. Sprinkle sugar evenly on top.3. Cut one piece of apple into a thick round disk and place in the center of the skillet to serve as the "button." Arrange the remaining apple pieces, each one standing on its flat end, in concentric circles around the button. Keep the pieces close together so that they support one another, standing upright. They will look like the petals of a flower.4. On a floured surface, roll out the puff pastry about 1/8-inch thick. Place an upside-down bowl or pan on the pastry and use the tip of a sharp knife to cut out a circle about the same size as the top of your skillet. Lift out the circle and drape gently over the apples. Use your hands to tuck the pastry around the apple pieces, hugging them together firmly.5. Place the skillet on the stovetop over medium heat until golden-brown juice begins to bubble around the edges, 3 minutes (if the juices keep rising, spoon out as needed to remain level with pastry). Keep cooking until the juices are turning darker brown and smell caramelized, no longer than 10 minutes more.6. Transfer skillet to the oven and bake 45-50 minutes, until puff pastry is browned and firm.7. Let cool 5 minutes, then carefully turn out onto a round serving plate. (Or, if not serving immediately, let cool completely in the pan; when ready to serve, rewarm for 15 minutes in a 350-degree oven before turning out.) If any apples remain stuck in the pan, gently use your fingers or a spatula to retrieve them, and rearrange on the pastry shell. Cut in wedges and serve warm with heavy cream, crème fraîche or vanilla ice cream.© 2014 New York Times News Service
Advertisement


