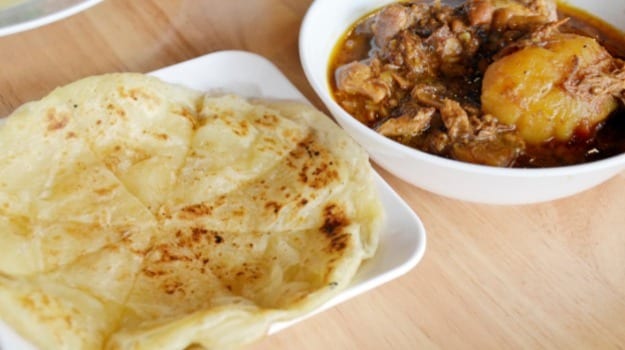
The great 'Malabar Parotta' or 'Barota' is a thing of immense joy. Distinct from its North Indian cousin (the Lachcha Parantha) and closer to its Malay counterpart, the Roti Cannai, a good Malabar Paratha is flaky yet fluffy, crisp yet soft. Having gorged myself sick on many of these, I can tell you that this unleavened flatbread is the perfect accompaniment to many a dish. These flaky thin layers will trap coconutty curries like Chicken Chettinad and rich meaty stews or provide the perfectly delicious crisp-soft cover for enveloping deep, dark, South Indian stir-fries. You know the ones that are abundant with caramelised shallots, pepper and curry leaves.
And yet, it's surprisingly difficult to get hold of a Malabar Parotta in Mumbai or Delhi and almost as tough to lay your hands on a perfectly made one in Kerala or Tamil Nadu, abundant though they maybe with parottas. And while it's hardly ever made in homes, this bounty of the kallshap (toddy shops) and chayakadas (tea shops) is surprisingly easy to master. That is, as long as you are armed with the right recipe and have a few tricks up your sleeve. Get those wrong, and this could be an easy one to falter with.
Which is why, having long lusted after the perfection that is a seriously good Kerala, I decided it was time to crack the code. And so began my parotta making marathon. Having been through every kind of result you can imagine (thick rubbery ones, thin pappad-like ones, hard chewy ones to papery tasteless ones); much research, 4 attempts and countless meals of parotta later, I finally found the foolproof recipe I've been looking for. Truly exceptional parottas that can be made right at home.
The process
Most recipes I looked at looked more or less similar at first glance. The essential components being all-purpose flour (maida), salt, oil and water. In addition to this, some included ingredients that enriched the dough (egg, more oil, ghee, milk) and raising agents (baking soda, baking powder). The other key variation lies in the shaping technique, critical to a bread where the texture is one of its key characteristics. Wanting to test out the impact of each of these variations, I shortlisted 3 recipes to see what would worked out in the humble home kitchen.
Round 1 - Suriani Kitchen, Lathika George

The technique
Considered the definitive bible on Kerala cooking by many a contemporary citified Keralite, this book has been my go-to when I'm unable to pester my mother for recipes. Unfortunately, among the list of hits and misses from this book, I'm going to have to count this one as a miss. The addition of baking powder predictably resulted in the thickening of the bread as soon as it hit the griddle and therefore a thicker parotta than desired. Also, despite the addition of oil in the dough, the resultant parotta was chewy rather than soft. Apart from the disproportionately low amount of salt asked for in the recipe, the biggest grouse I have with this recipe is that the instructions themselves leave a lot to interpretation and make the shaping task a bit of a walk down a blind alley.
The result
Not the layered, flaky bread we wanted. This was a thick, tough parotta without the desired flavour or texture. And so, on to the next one.
Round 2 - Prashad, Compiled by Jiggs Kalra

The technique
A definite improvement on Round 1, the recipe from this gem of a book delivered very well on the clear, concise directions, especially when it came to the critical aspect of shaping. Prashad's recipe included milk instead of water, a higher amount of sugar, a pinch of baking soda (instead of the half teaspoon of baking powder in Lathika's) and an additional egg for added richness. Like in Lathika's recipe, oil was added to the dough while kneading but butter replaced the oil while shaping. The resting time for the dough before baking on the other hand was shorter and neither recipe indicated the amount of water or the consistency of the dough well enough to know what to aim for.
The result
The perfect shaping technique did create a parotta that was flakier than the first. On the other hand the added fat in the dough once more resulted in the bread being too crisp - more of what one would expect from a whole wheat lachcha parantha than the softness one would expect from a Kerala Parotta. The taste of egg was overpowering and butter instead of oil made the parotta far too rich for my liking.
Round 3 - Vahchef, (Sanjay Thumma)

The technique
This is only recipe I tried that used just salt, flour and water for the dough mix. Neither oil, egg nor milk were used to make the dough rich. On the other raising agents (baking powder or baking soda) were conspicuously absent. To my delight, despite the lack of added protein or fat, the dough stretched to a membrane far thinner than my previous two attempts. I am convinced that the secret here was the resting periods between kneading, shaping and rolling, the moisture in the dough and the oil that is spread over the shaped dough balls rather than in the dough itself.
The Result
Despite the gorgeous texture of the bread, the parotta missed the richness of the milk and egg and the sweetness of the Kerala Parotta I have grown up loving and was aiming to replicate. Having said that, if you are looking for a vegetarian or a dairy-free version, dial up the sugar just a bit, and this one is a fantastic recipe to work with at home.
My Foolproof Recipe For The Perfect Kerala Parotta
Finally, with some advice from the Chef at Bread World, Cochin where I've had some of the best Kerala Parottas, I worked out a recipe that checked all the boxes for me. I added egg and milk (which you can replace with water if your want) for flavour but left out the leaveners to get those thin gossamer like layers and avoid the thickening that the raising agents would inevitably result in.
You will also notice that I added sugar for that tinge of sweetness and copious amount of water to produce a lovely moist, soft dough that stretches like a dream. Working with Vahchefs trick of letting the dough mix rest before starting the kneading allows the dough to soak up the additional moisture while reducing the stickiness and making it easier to knead. I also found that kneading the dough with warm water and a rest between kneading rounds made it easier for the gluten to develop while reducing the amount of elbow grease I needed to put in to achieve the texture I was looking for. Coating the dough generously with oil between shaping and rolling kept it soft and moist, helping it relax into a beautiful, obediently pliable dough.
The Result: A foolproof recipe for the perfect Parotta made right at home. Soft yet crisp, moist yet flaky, fluffy yet rich enough. Absolutely spot on!!

Bombay Chowparty's Failproof Kerala Parotta
2 cups Maida (all purpose flour) - heaped cups and about half a cup extra to use as needed
125 ml Milk (you can replace this with water if you like)
2-3 tsp Sugar
1 Egg - 1
1 tsp Salt
Cooking Oil - to grease, shape and cook with
Water - as needed
1. Crack the egg into a measuring cup or teacup and beat lightly with the sugar. Add the milk and then enough water to just about fill the cup to the brim
2. Add the flour and salt to a bowl, mix well so the salt is evenly incorporated. Make a well in the middle and pour in the egg mixture. Stir well enough so you have a sticky, shaggy dough. Cover and keep aside for 15 minutes.
3. Start kneading the dough adding not more than a tablespoon of flour at a time if you find the dough to be far too sticky. At this point, you are aiming for a very soft dough that is slightly sticky when you press into it with your hands. Keep aside to rest for another 10 minutes.
4. After the 10 minutes, start kneading your dough again. Rub your hands with oil and drizzle a tablespoon or so around the edges of the dough ball to make it less sticky and easier to knead. Knead for about 5-10 minutes till its soft and smooth. Divide into 4 parts, roll each part into a ball, brush or rub oil generously over the dough balls, cover with a clean tea towel and leave aside to rest for 35 minutes.
5. This time when you return to the dough you should find that it has slackened greatly. Grease your work surface with oil, place the dough ball on it and press with your fingers to flatten. Start rolling with a rolling pin to make a thin rectangle without tearing the dough. (Do not use any flour for rolling).
6. Now slip your hands under one edge of the dough sheet and gently pull it so that it stretches and becomes thinner. Stretch the dough from all directions till you have a squarish sheet that is at least 15 inch in width. The dough should stretch rather easily. A few small tears are fine. (if you find that you make a mess of your initial attempt, don't worry, roll the dough into a ball and leave aside to relax for 5-10 minutes to relax before starting again.)
7. Drizzle oil all over the stretched out sheet and spread it with your hands or a basting brush. Sprinkle 2-3 tablespoons of flour evenly over the sheet. Now gently lift one of the edges of the rolled sheet with both your hands and start folding it into a fan or a piano fold. Keep doing this till the entire sheet is folded into a long folded strip. Do not worry if your folding is not perfectly even. Starting from one end, pick up the folded strip and coil the strip around itself into a spiral. Try and ensure that the folds in the strip face the top. Tuck the loose end under the coil, brush generously with oil once more and set aside for 5 minutes. Repeat with the other 3 dough balls.
8. Heat you griddle or tawa and meanwhile start rolling out the coils into a parotta that is about 9 inches in diameter.
9. Half-cook the parottas on the hot griddle, turning once and then shallow fry by pouring and spreading a tablespoon of oil on each side. The parottas should be flecked with golden spots and crisp on the outside when done. Set aside on a towel and cook the other 3 parottas, stacking them as they are done.
10. Crumple the stack of parottas with both your hands so that the layers separate, the flakiness is enhanced and you get the lovely uneven layers that are the beauty of a parotta.
11. Enjoy the hot, crisp fruit of your labour!!
Disclaimer:
The opinions expressed within this article are the personal opinions of the author. NDTV is not responsible for the accuracy, completeness, suitability, or validity of any information on this article. All information is provided on an as-is basis. The information, facts or opinions appearing in the article do not reflect the views of NDTV and NDTV does not assume any responsibility or liability for the same.


