For many of us, dosa is the comfort food we can never refuse. It is crispy, golden, and served hot with chutney and sambar, making it absolutely irresistible. Traditionally, this dosa magic is credited to a heavy cast iron pan. But not every home kitchen has one. If you are a beginner or new to the dosa-making process, this could feel like a roadblock. While getting crispy dosas delivered through your favourite food delivery app is always an option, there are times when we crave that home-cooked goodness. The good news? You can achieve the same restaurant-style crispiness using a non-stick pan or even a regular tawa. All you need are a few tried-and-tested tricks. Here are six easy tips to make dosas that are crisp and delicious every time - no cast iron required.
Also Read: Karam Dosa - A Unique Culinary Delight From Andhra Pradesh That You'll Love
6 Easy Tips To Make Crispy Dosa Without A Cast Iron Pan:
1. Choose The Right Pan For Crispy Dosa

While cast iron is the traditional choice for dosa, a non-stick pan or heavy-bottomed steel tawa can work just as well. The key is even heat distribution. A flat base makes spreading the batter easier and thinner. If you are using steel, give it a little extra preheating time before pouring the batter. Remember, the surface quality of your pan matters more than the material.
2. Maintain The Perfect Heat
One of the most common mistakes while making dosa is pouring the batter on an extremely hot pan, which causes clumping. On the other hand, if the pan is too cold, the dosa will not crisp up. The solution is to keep the heat at a steady medium level. Sprinkle a few drops of water to test - if they sizzle and evaporate in two to three seconds, your pan is ready. Consistent heat is what transforms a simple batter into that golden, crunchy delight.
3. Spread The Batter Thin
The thinner the batter spread, the crispier the dosa. Start from the centre and move outwards in a spiral motion using a light hand. Avoid overloading the ladle, as too much batter will make the dosa thick and soft instead of crunchy. A slightly runnier batter consistency also helps in achieving that thin, paper-like spread.
4. Grease Lightly For Perfect Texture
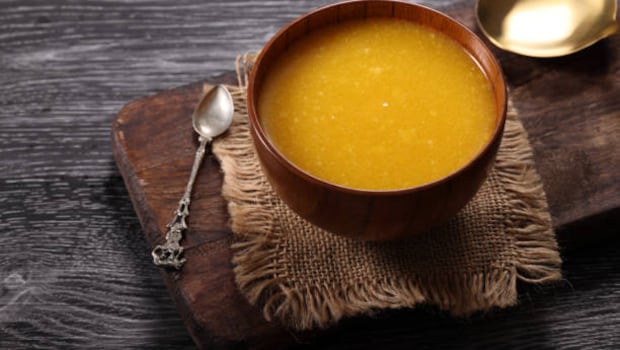
Too much oil is a big mistake. Over-greasing will prevent the batter from sticking and crisping properly. Instead, lightly brush or drizzle ghee after spreading the batter. A gentle drizzle around the edges is enough to give the dosa those golden, lacy sides. The goal is a crisp dosa, not an oily one, so use a light hand.
5. Cook Without Disturbing
Patience is the secret ingredient. Once you spread the batter, avoid poking, lifting, or flipping it too soon. Let it cook on medium heat until the surface looks dry and the edges start lifting on their own. Then, gently loosen it with a flat spatula. Flipping is optional - most South Indian homes do not flip dosas. And yes, if you feel tempted to skip the wait, remember that ordering one online is quicker, but not as satisfying.
6. Clean The Pan Between Dosas
After every dosa, crumbs or excess oil can ruin the next one. Wipe the pan with a damp cloth before making the next batch. This keeps the surface smooth and prevents sticking. It is a small step but makes a big difference, especially when cooking multiple dosas in one go.
If you follow these tips, you can enjoy restaurant-style crispy dosa at home. However, as mentioned earlier, patience is key. If you do not get it right on the first try, keep practising. And until then, there is no harm in ordering in from your favourite food delivery app and enjoying the flavours while you master the skill.
Why Is Homemade Dosa Not Crispy? Common Mistakes To Avoid
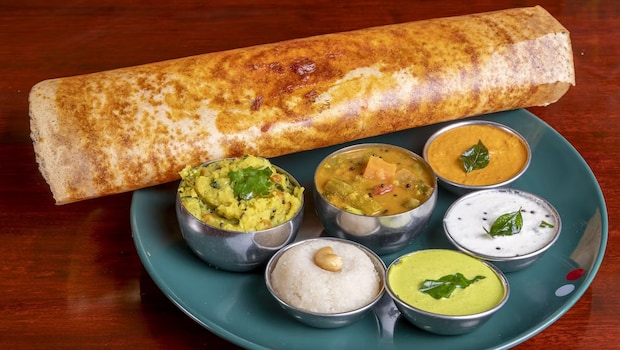
If your homemade dosas are turning out soft instead of crisp, you might be making one of these mistakes:
Too Thick Batter: Thick batter makes the dosa heavy and chewy. Dilute it slightly with water for an even, thin spread.
Pan Not Hot Enough: Always preheat your pan properly before pouring the batter.
Over-Greasing: Too much oil makes dosas soggy. Use just a light brush of ghee or oil.
Old Batter: Batter that has been refrigerated too long may lose fermentation strength, resulting in softer dosas.
Batter Tips For Crispy Dosa At Home
The real secret behind an excellent dosa lies in its batter. Here is what you need to do:
Fermentation Time: Let the batter rest for 8 to 10 hours in a warm spot. During winter, keep it in the oven with the light on.
Rice To Dal Ratio: A 3:1 ratio of rice to urad dal works best for crispness.
Storage: Fresh batter makes the crispiest dosas. If refrigerated, allow it to return to room temperature before use.
Add-Ons: A pinch of fenugreek (methi) seeds during soaking improves fermentation and enhances crispiness.
What Type Of Rice Is Best For Crispy Dosa?

The choice of rice impacts the dosa texture. Idli rice (parboiled rice) is ideal because it ferments well and gives dosas their signature crisp edges. You can mix idli rice with a portion of raw rice for extra crunch. Some home cooks also add a tablespoon of rice flour to the batter for better crispness. Avoid using only raw rice, as it may result in brittle dosas that break easily.
Can You Make Dosa Without Fermentation?
If you forgot to soak and ferment batter, you can still make instant dosas. Use a mix of rice flour and semolina with curd and water to create a quick batter. Let it rest for 30 minutes before cooking. While it will not have the same fermented flavour as a traditional dosa, it is a handy shortcut for sudden cravings.
Why Does Dosa Stick To The Pan?
Sticky dosas are frustrating. The reasons usually include:
Unseasoned Pan: If the tawa is brand new or not well-seasoned, the batter sticks.
Pan Temperature: Pouring batter on a pan that is either too hot or too cold causes sticking.
Oil Residue: Excess oil can make the batter slide instead of stick.
Solution: Season your tawa by rubbing it with a cut onion dipped in oil before every dosa. Keep the heat consistent and wipe excess oil between batches.
How To Make Dosa Crispy Outside And Soft Inside

Want that perfect masala dosa texture with crisp edges and a soft centre? Here is how:
Spread the batter thin on the outer edges but slightly thicker in the middle.
Cook on medium heat so the centre remains soft while the edges turn golden.
Add a little ghee to the edges and cook until the centre just sets without becoming dry.
What Is The Ideal Rice-To-Dal Ratio For Dosa Batter?
The typical ratio of rice to urad dal for dosa batter is 2:1 or 4:1, depending on whether you use idli rice or regular raw rice. For a combination of idli rice and raw rice, the ratio is often 2.5:2.5:1 (idli rice: raw rice: urad dal).
Also Read: 6 Easy Tips For Tandoori-Style Charred Paneer At Home Using Just A Tawa
Chef-Approved Tips For Restaurant-Style Dosa
Use chilled water for grinding batter - it prevents overheating and gives a smoother blend.
Add a tablespoon of poha (flattened rice) for extra crispiness.
Always cook on medium heat, never high, for even browning.
A well-fermented batter is your best friend. Check for bubbles and a mild sour aroma before cooking.
How To Keep Dosas Crispy For Longer

If you plan to serve dosas later, follow these tips:
Stack them with paper towels in between layers.
Store in a preheated, turned-off oven or use an insulated casserole.
Cook on a seasoned tawa on medium-high heat and add a little extra oil during cooking.
Ensure the batter is properly fermented and consider adding rice flour or semolina to improve crispness.
So, the next time you crave a crispy dosa, do not let the absence of a cast-iron pan stop you. With the right pan, heat, and batter tricks, you can master this South Indian classic at home without any hassle.
Disclosure: This article may contain links to third-party websites or resources. However, this does not affect the integrity of the content, and all recommendations and views are based on our independent research and judgment.
About Nikita NikhilMeet Nikita, a passionate soul with an insatiable love for two things in life: Bollywood and food! When she's not indulging in binge-watching sessions, Nikita can be found behind the lens capturing moments or expressing her creativity through painting.


